![]()
Place Widgets on the Page
Note: For information about how to create a widget, see Creating the “Hello World” Widget.
After Pierre and the Marketing team create the page, a new page opens. It contains one dropzone, which consists of two columns (shown below).
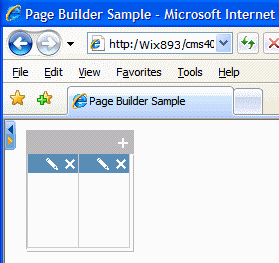
The top of the page contains a PageBuilder menu control. Pierre will use it to perform actions on the page, such as check in, view properties, and drop widgets onto the page.

Pierre uses the right/left arrow buttons (circled below) to open and close the PageBuilder menu.
Pierre could choose to stop the Auto Hide feature for the PageBuilder menu by clicking the thumbtack (circled below).

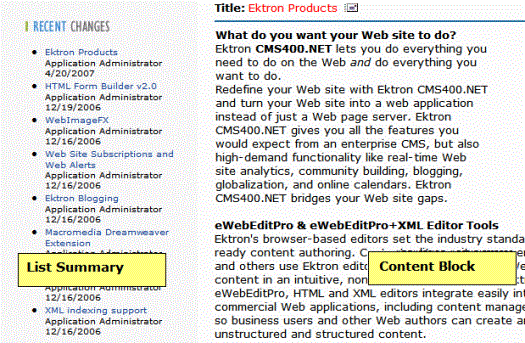
Pierre determines that the page needs a two-column layout, as shown below.
Note: Although you can drop existing content onto the page, the Marketing team will create new content on the page.
The left column is 35% wide and displays a list of all content in the Marketing folder. Web site visitors use the list to access all Marketing collateral for AcmeBooks.com.
The right column is 65% wide and displays a single content block.
Pierre’s Marketing team creates this layout in three steps:
Part 1: Add New Column and Set Column Widths
Part 2: Insert New Content Block Widget into Right Column


![]()